February 21 2024
Capturing the Ride: A Guide to Mountain Bike Photography
Share
- Link Link Copied
- TripAdvisor
- X
Travel mountain bike photography merges my greatest passions: the adrenaline of mountain biking with the adventure of exploration, new cultures and landscapes with the artistry of photography.
It’s about freezing a moment that encapsulates the beauty and the spirit of adventure that defines our sport. Embarking on a mountain bike trip isn’t just a hobby; it’s a journey through life’s rugged trails and breathtaking vistas. What better way to immortalize these moments than through the lens of a camera, transforming each ride into a visually stunning narrative?
Key Takeaways
Gear Essentials
Utilize a combination of DSLRs, mirrorless cameras, smartphones, GoPros, and drones to capture diverse perspectives and dynamic shots.
Photography Tips
Employ techniques like the Rule of Thirds, Leading Lines, varied Angles, Framing, and Lighting to create compelling narratives.
Action Shots
Use Panning Techniques and Burst Mode to capture speed and freeze moments of action, enhancing the storytelling aspect.
Creative Perspectives
Experiment with different angles and natural frames to add depth and drama to your shots.
Lighting
Harness the power of natural light, especially during golden hours, to enhance the mood and detail of your photos.
Post-Production
Utilize software like Adobe Lightroom or mobile apps for adjusting exposure, color correction, sharpening, and cropping to enhance your shots.
GoPro and Phone Photography
Take advantage of wide-angle lenses, mounts, and mobile editing apps to capture and edit stunning action shots on the go.
Gear Essentials for Mountain Bike Photographers
Embarking on a mountain bike photoshoot now embraces the versatility of modern technology. Alongside traditional DSLRs or mirrorless cameras, the use of high-quality mobile phones and GoPro’s has become increasingly popular.
These compact devices are not only convenient but also capable of capturing stunning mountain biking pictures with impressive clarity and depth.
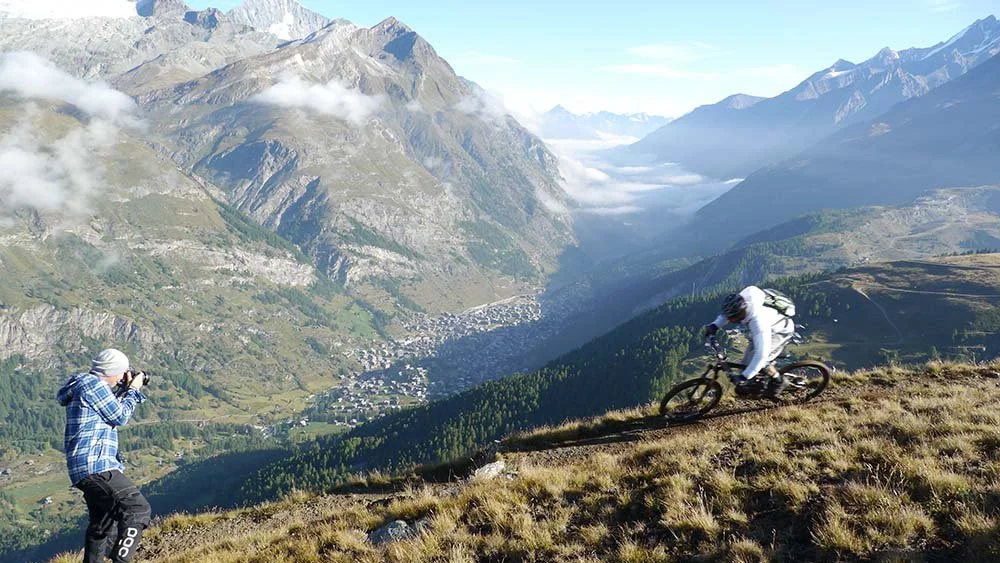
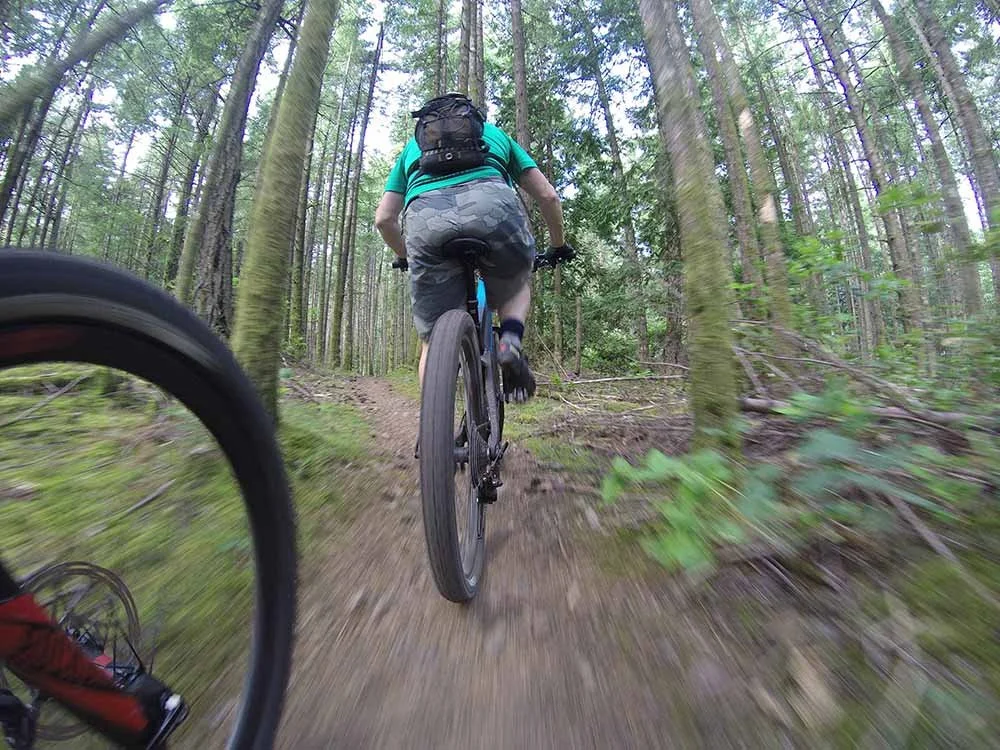
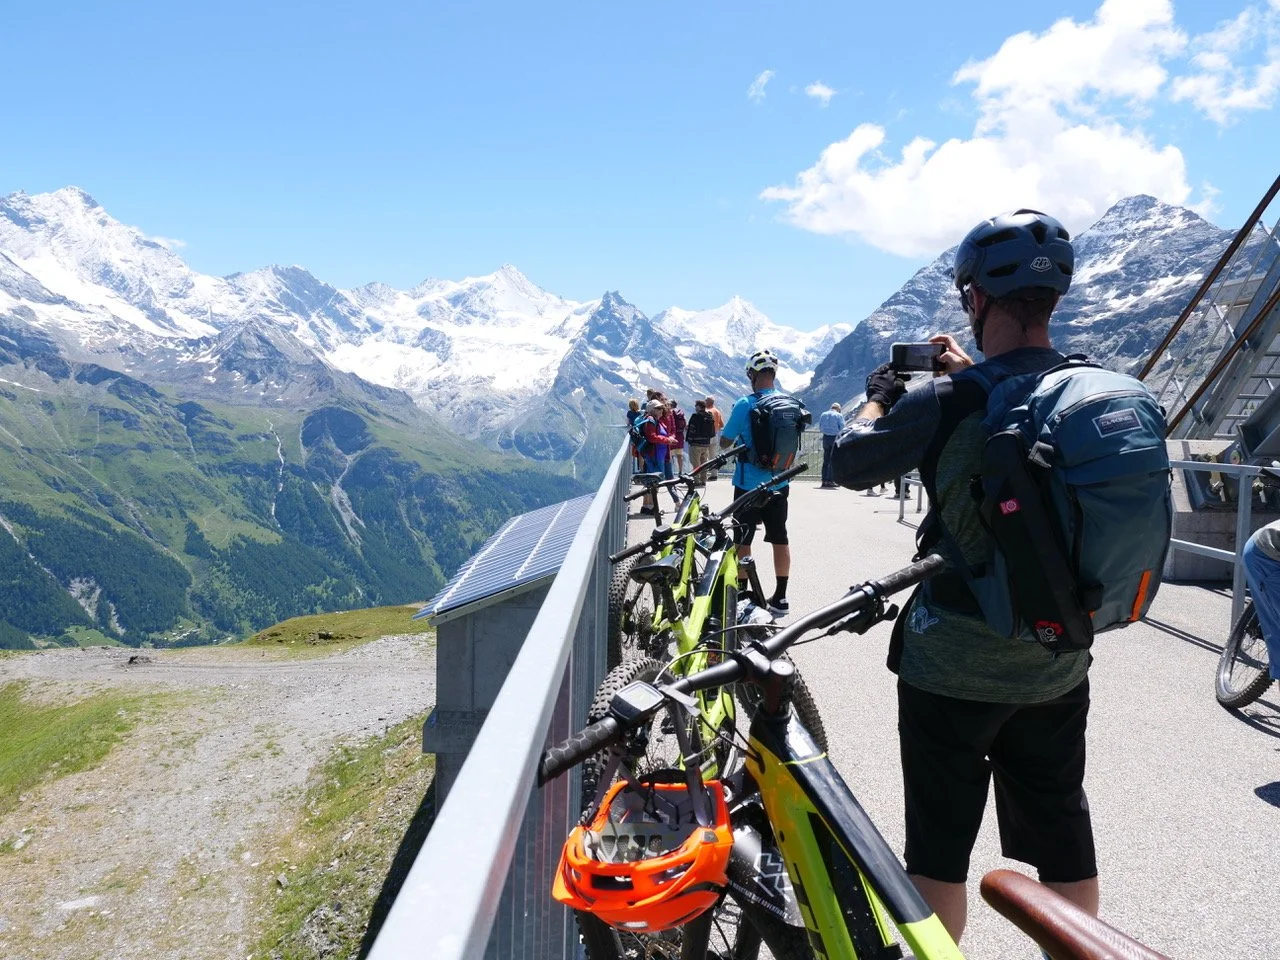
A good smartphone can offer the agility to shoot on the fly, while a GoPro, mounted on a helmet, your chest of your bike, provides dynamic first-person perspectives of the ride. A drone offers yet another unique angle. The choice of gear should complement your storytelling, whether it’s through the detailed lens of a camera or the wide, immersive view of a GoPro.
Mountain Bike Photography Tips
The world of mountain biking photography is as varied as the singletrack we ride.
Utilizing techniques like the Rule of Thirds can transform a simple shot into a compelling narrative, guiding the viewer’s eye and emphasizing the rider’s journey.
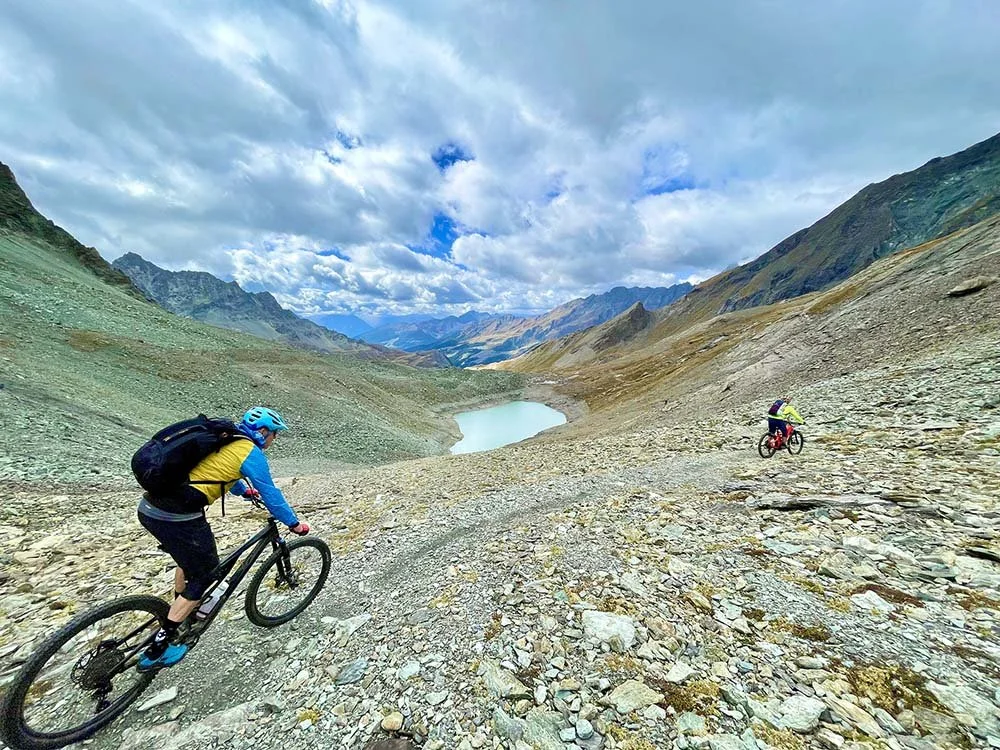
The Leading Lines of a trail can draw the viewer deeper into the image, creating a sense of movement and anticipation. Experimenting with Angles, Framing, and Lighting can dramatically alter the mood and impact of your mtb photoshoot, turning ordinary mountain biking images into vivid stories of adventure.
From the speed of a downhill rush captured with Panning Techniques to the deliberate blur of a biker in motion, each method offers a unique perspective. The Burst Mode becomes your best friend in catching lively sequences, ensuring you never miss the action.
But it’s not just about action; it’s about the stories we tell through Color, Contrast, and the intricate balance of Scene Depth and Scale, bringing the viewer into the ride.
Mountain bike photography is more than just taking pictures; it’s about capturing the soul of mountain biking and travel. With these tips and your camera in hand, you’re ready to document your journey, one shot at a time.

Dynamic Composition Using Rule of Thirds
- Visualize the Grid: Imagine your viewfinder or screen is divided by two horizontal and two vertical lines, creating nine equal parts.
- Position the Subject: Place your main subject, like the mountain biker or a key trail feature, at one of the points where the lines intersect.
- Balance the Scene: Use the grid lines to balance the rest of the scene, aligning the horizon, trees, or paths with these lines for a harmonious composition.Make it stand out
The Rule of Thirds is a foundational concept in photography, essential for dynamic composition. By imagining your frame divided into a 3×3 grid, position the mountain biker along these intersecting lines, rather than centering them. This approach not only creates a more engaging photo but also allows you to incorporate stunning landscapes, adding depth to your mountain biking images. It’s a simple technique that dramatically elevates the visual interest of your shots.
Guiding the Viewer with Leading Lines
Guiding the viewer with leading lines involves using natural or man-made lines in your photograph to direct the viewer’s attention to the main subject, enhancing the storytelling aspect of your image.
- Find Natural Lines: Look for trails, paths, or other lines in the landscape that lead towards your subject.
- Position Your Subject: Place your subject at the end of these leading lines to draw the viewer’s eye directly to them.
- Use Perspective: Experiment with different angles to emphasize the leading lines, enhancing the depth and directionality of the shot.
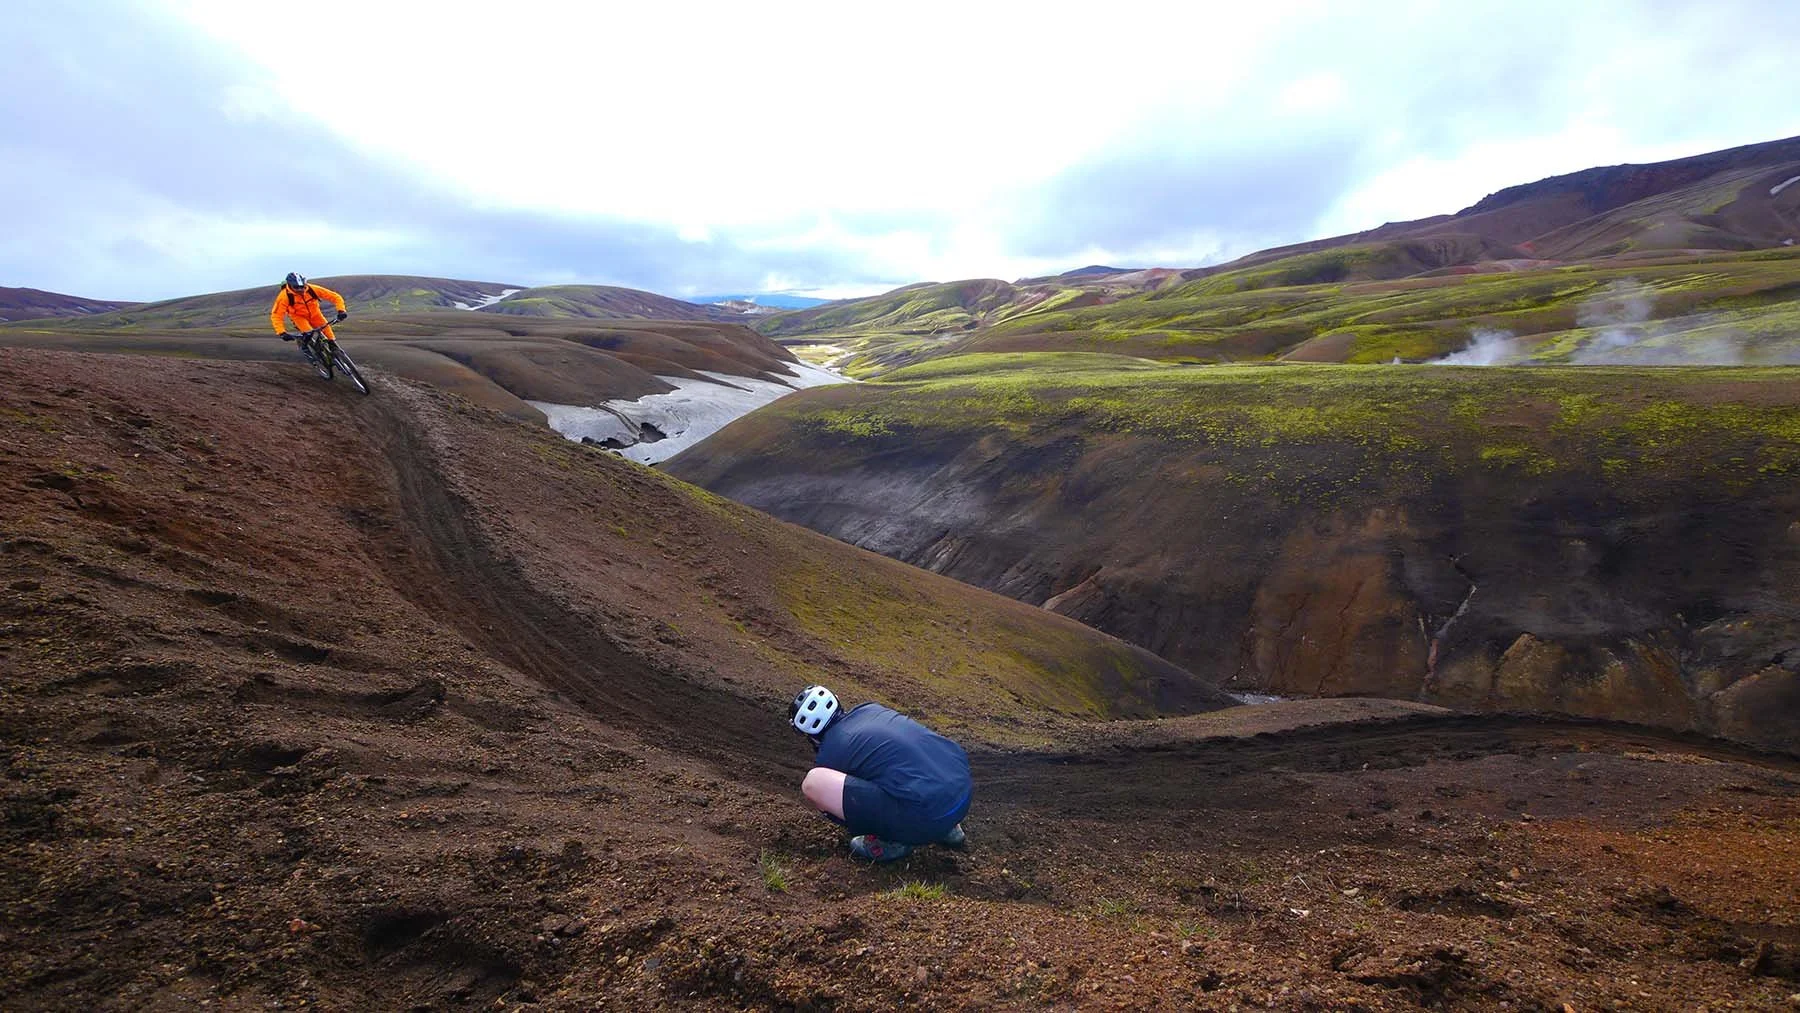
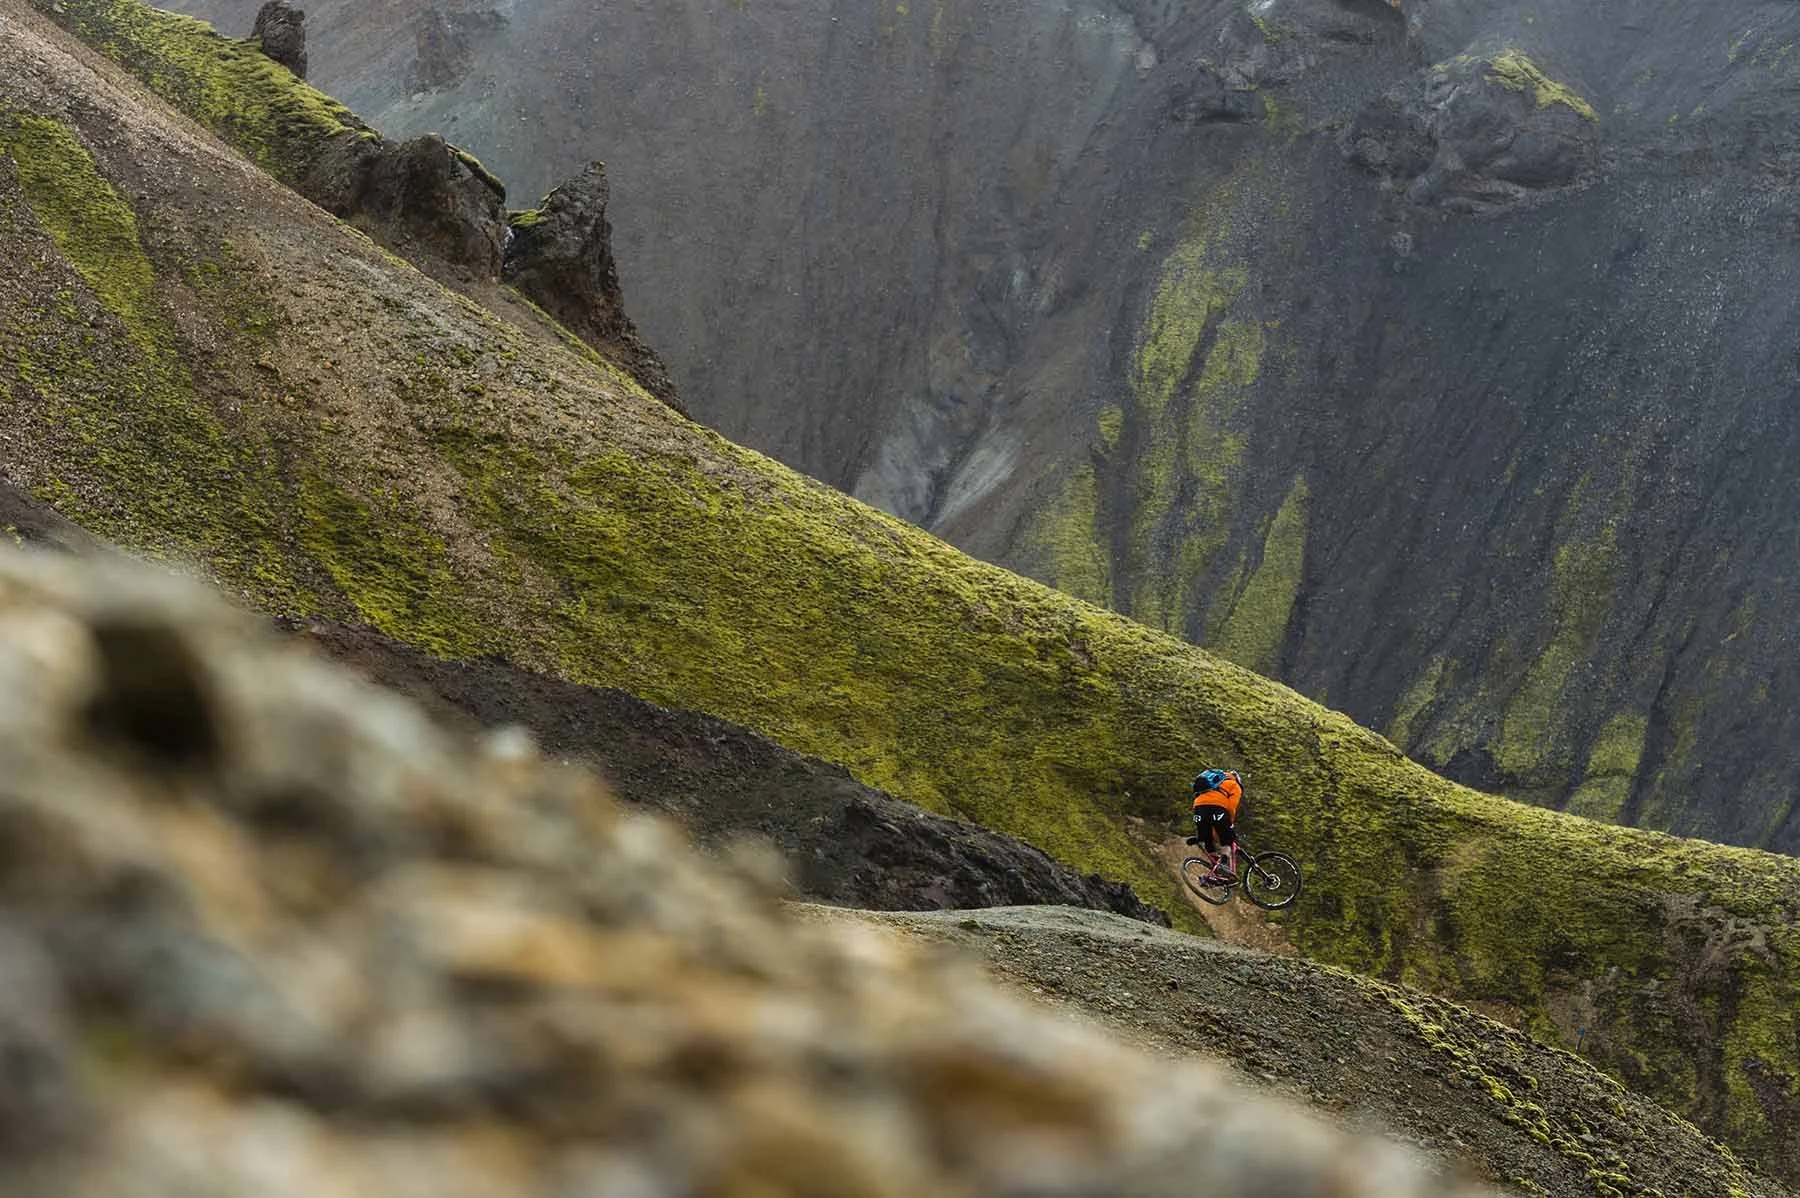
Creative Perspectives Through Varied Angles
Using natural frames involves incorporating elements like trees, archways, or rock formations around the edges of your photo to focus attention on the mountain biker, adding depth and a dramatic touch.
- Identify Framing Elements: Look for natural structures that can encircle your subject.
- Compose Your Shot: Position these elements around the edges of your frame, ensuring they don’t distract from the main subject.
- Adjust Your Position: Move around to align the frame perfectly with your subject for the most compelling composition.
Harnessing the Power of Lighting
Harnessing the power of lighting in photography means using natural light to enhance the mood, detail, and overall impact of your mountain biking photos.
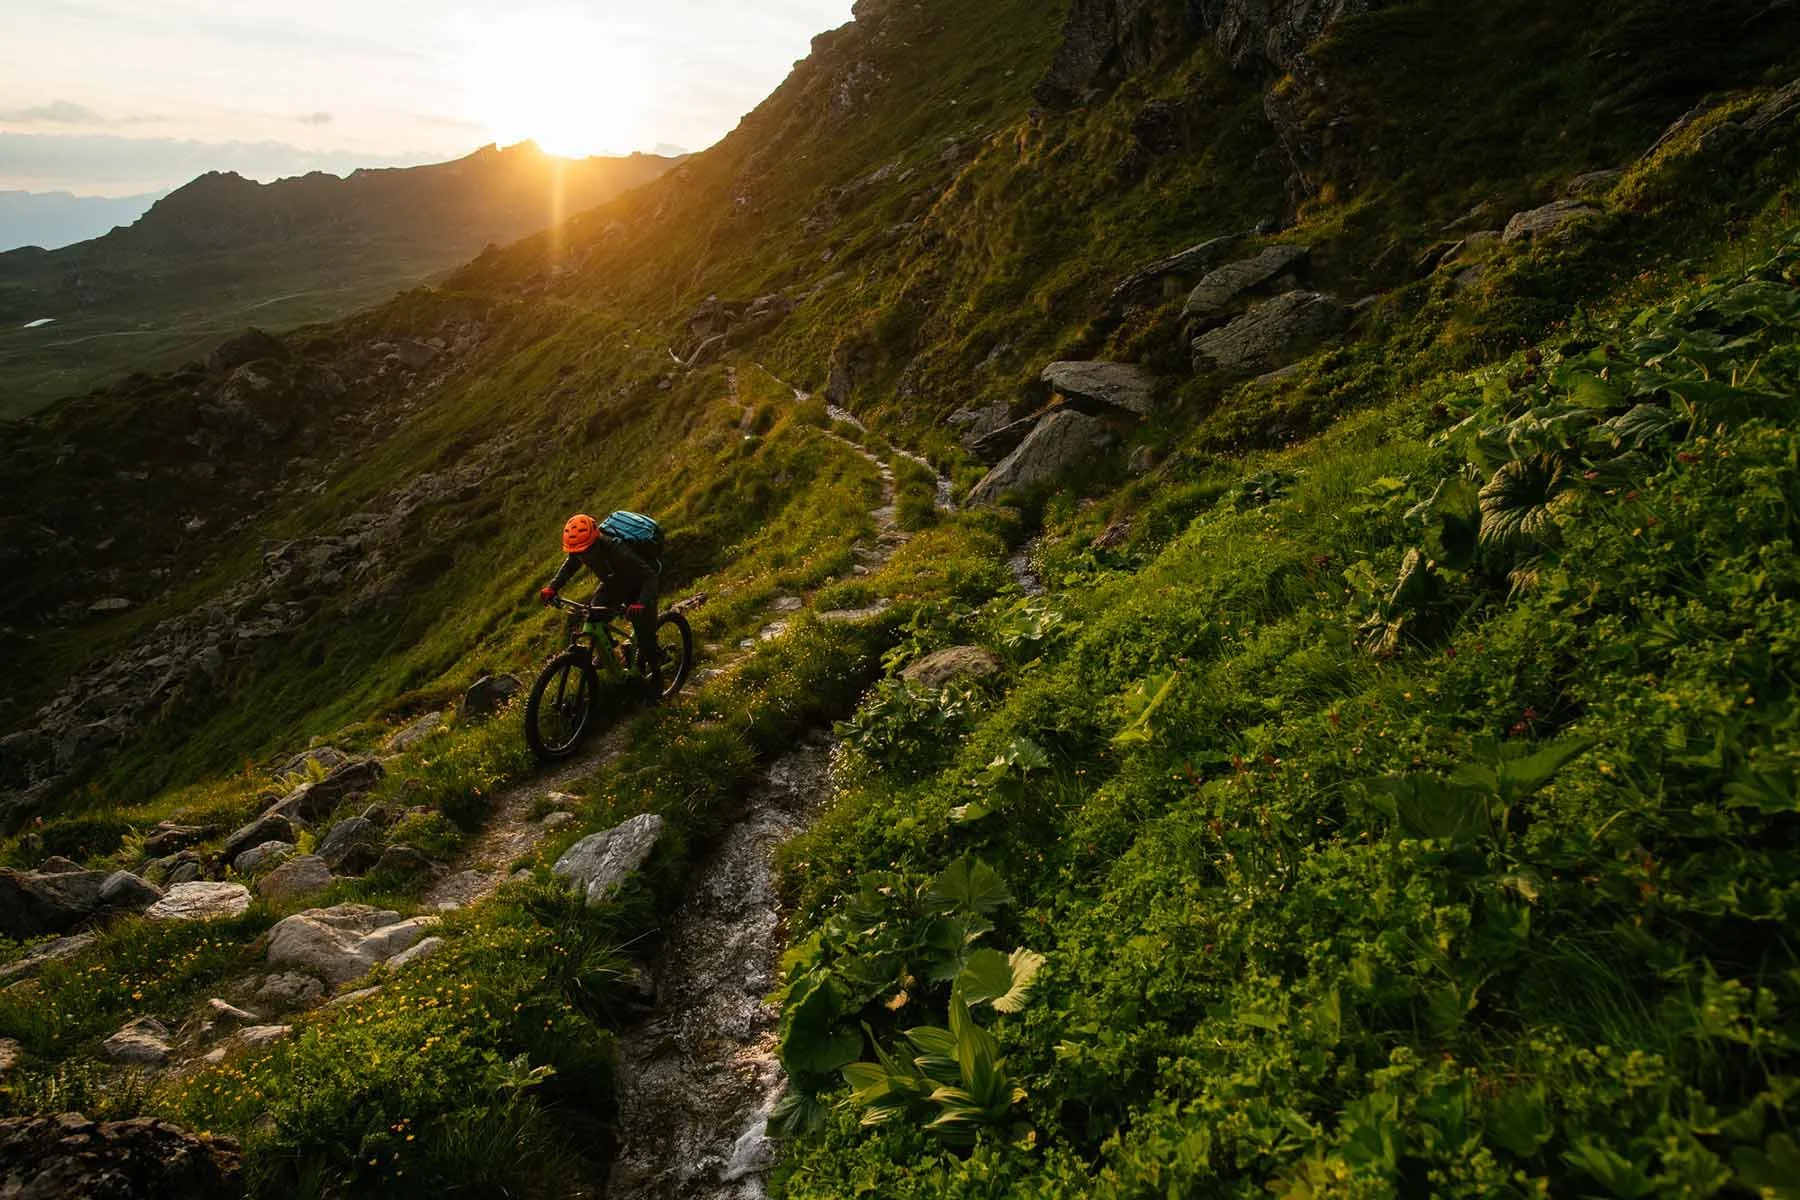
- Seek Golden Hours: Shoot during early morning or late afternoon when the light is soft and golden for a warm, flattering effect.
- Utilize Shadows: Play with shadows to add depth and texture, especially during the midday sun.
- Adjust to Overcast: Use diffused light on cloudy days to reduce harsh shadows and capture vibrant colors without the glare.
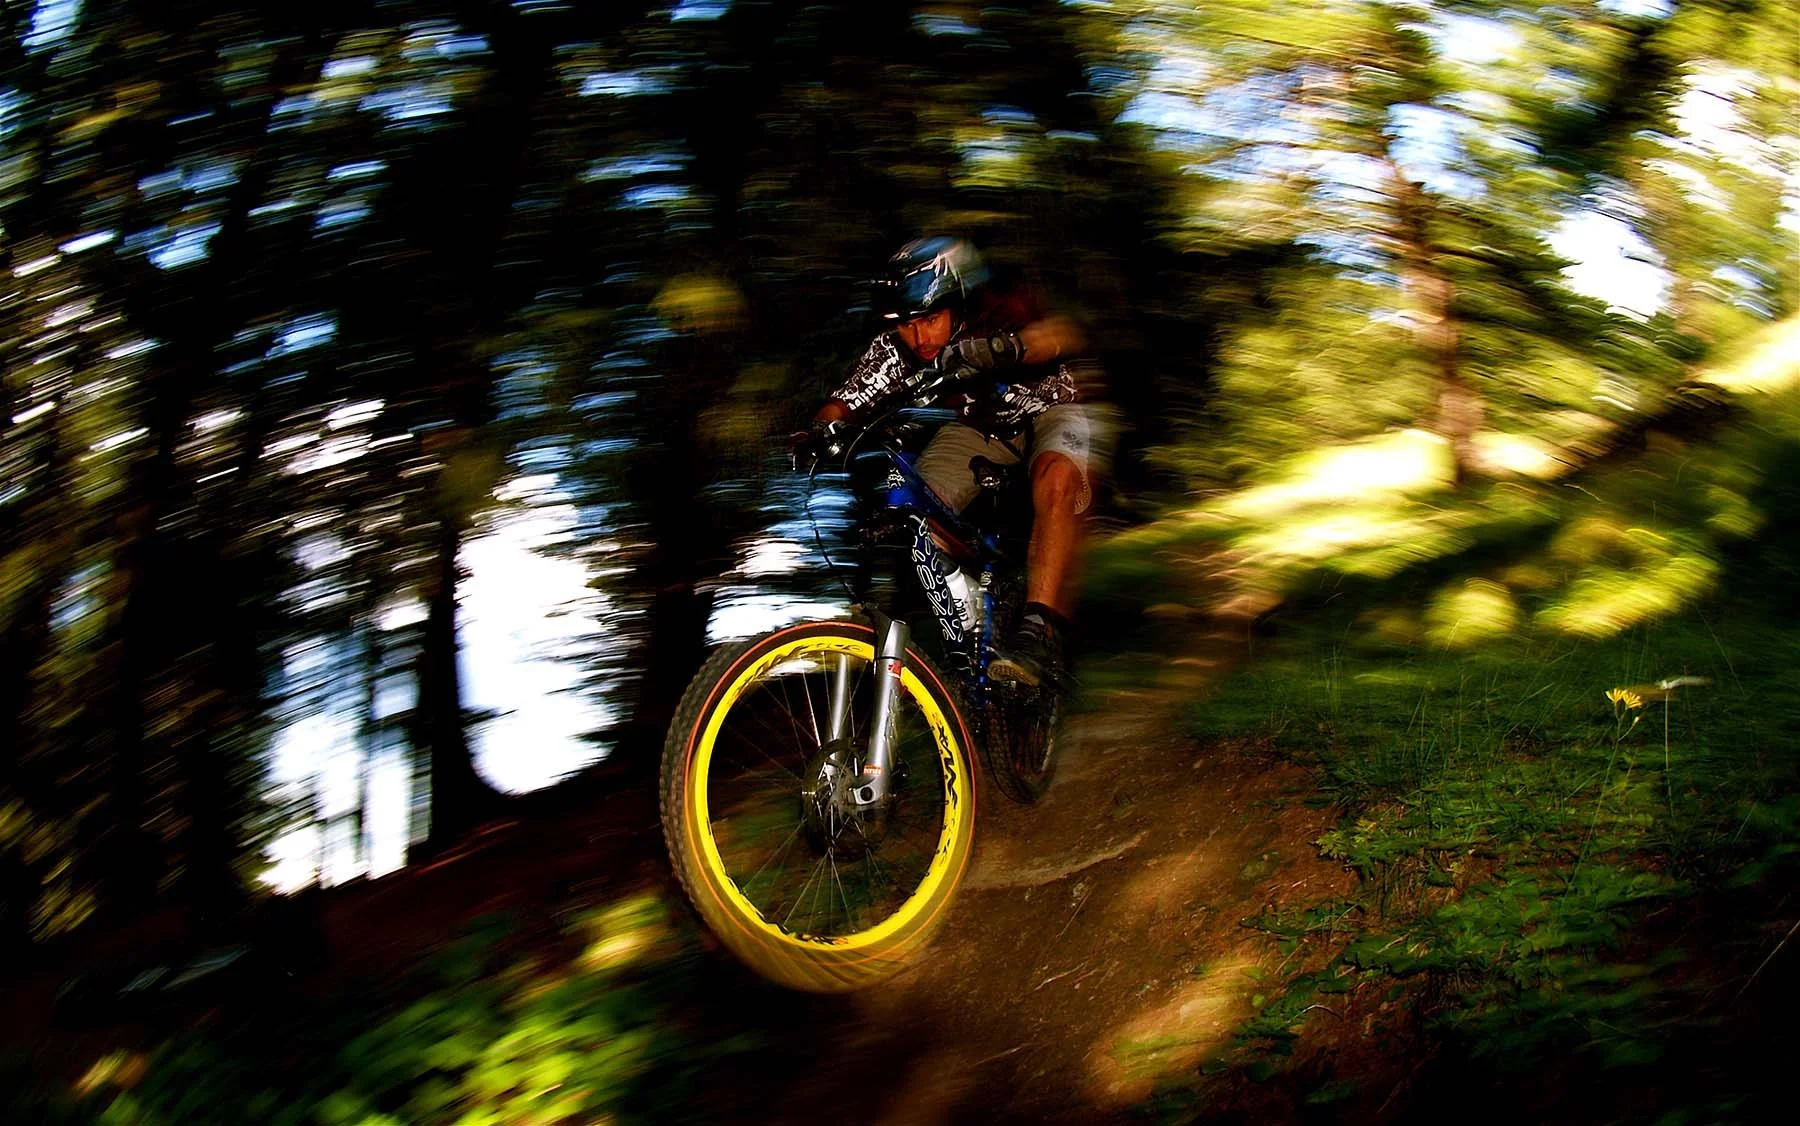
Capturing Speed with Panning Techniques
Capturing speed with panning techniques involves moving your camera along with the mountain biker to create a sharp subject against a blurred background, emphasizing motion.
- Set a Slow Shutter Speed: Start with a shutter speed around 1/30 to 1/60 second.
- Follow the Rider: Keep your camera level and smoothly follow the biker’s movement as they pass.
- Practice the Motion: It takes practice to get smooth panning shots, so keep trying to match the speed of your subject for the best results.
Artistic Motion with Blur Effects
Creating artistic motion with blur effects involves deliberately using slower shutter speeds or camera movements to blur parts of the image, adding a sense of movement and energy to your mountain bike photos.

- Choose Slower Shutter Speeds: Experiment with shutter speeds slower than 1/30 second to blur the moving parts of the scene.
- Steady Your Subject: Try to keep the bike and rider as sharp as possible while the background blurs.
- Experiment with Movement: Move the camera during the exposure for creative blur effects, like radial or zoom blur, to convey speed and dynamism.
Freezing the Moment in Action Shots
Freezing the moment in action shots is about capturing a crisp, clear image of the mountain biker at the peak of their action, with no motion blur, to highlight intensity and skill.
- Use a Fast Shutter Speed: Aim for shutter speeds of 1/800 second or faster.
- Anticipate the Action: Position yourself at a spot where you expect peak action to occur, like jumps or turns.
- Utilize Continuous Shooting Mode: Increase your chances of capturing the perfect moment by shooting in bursts.
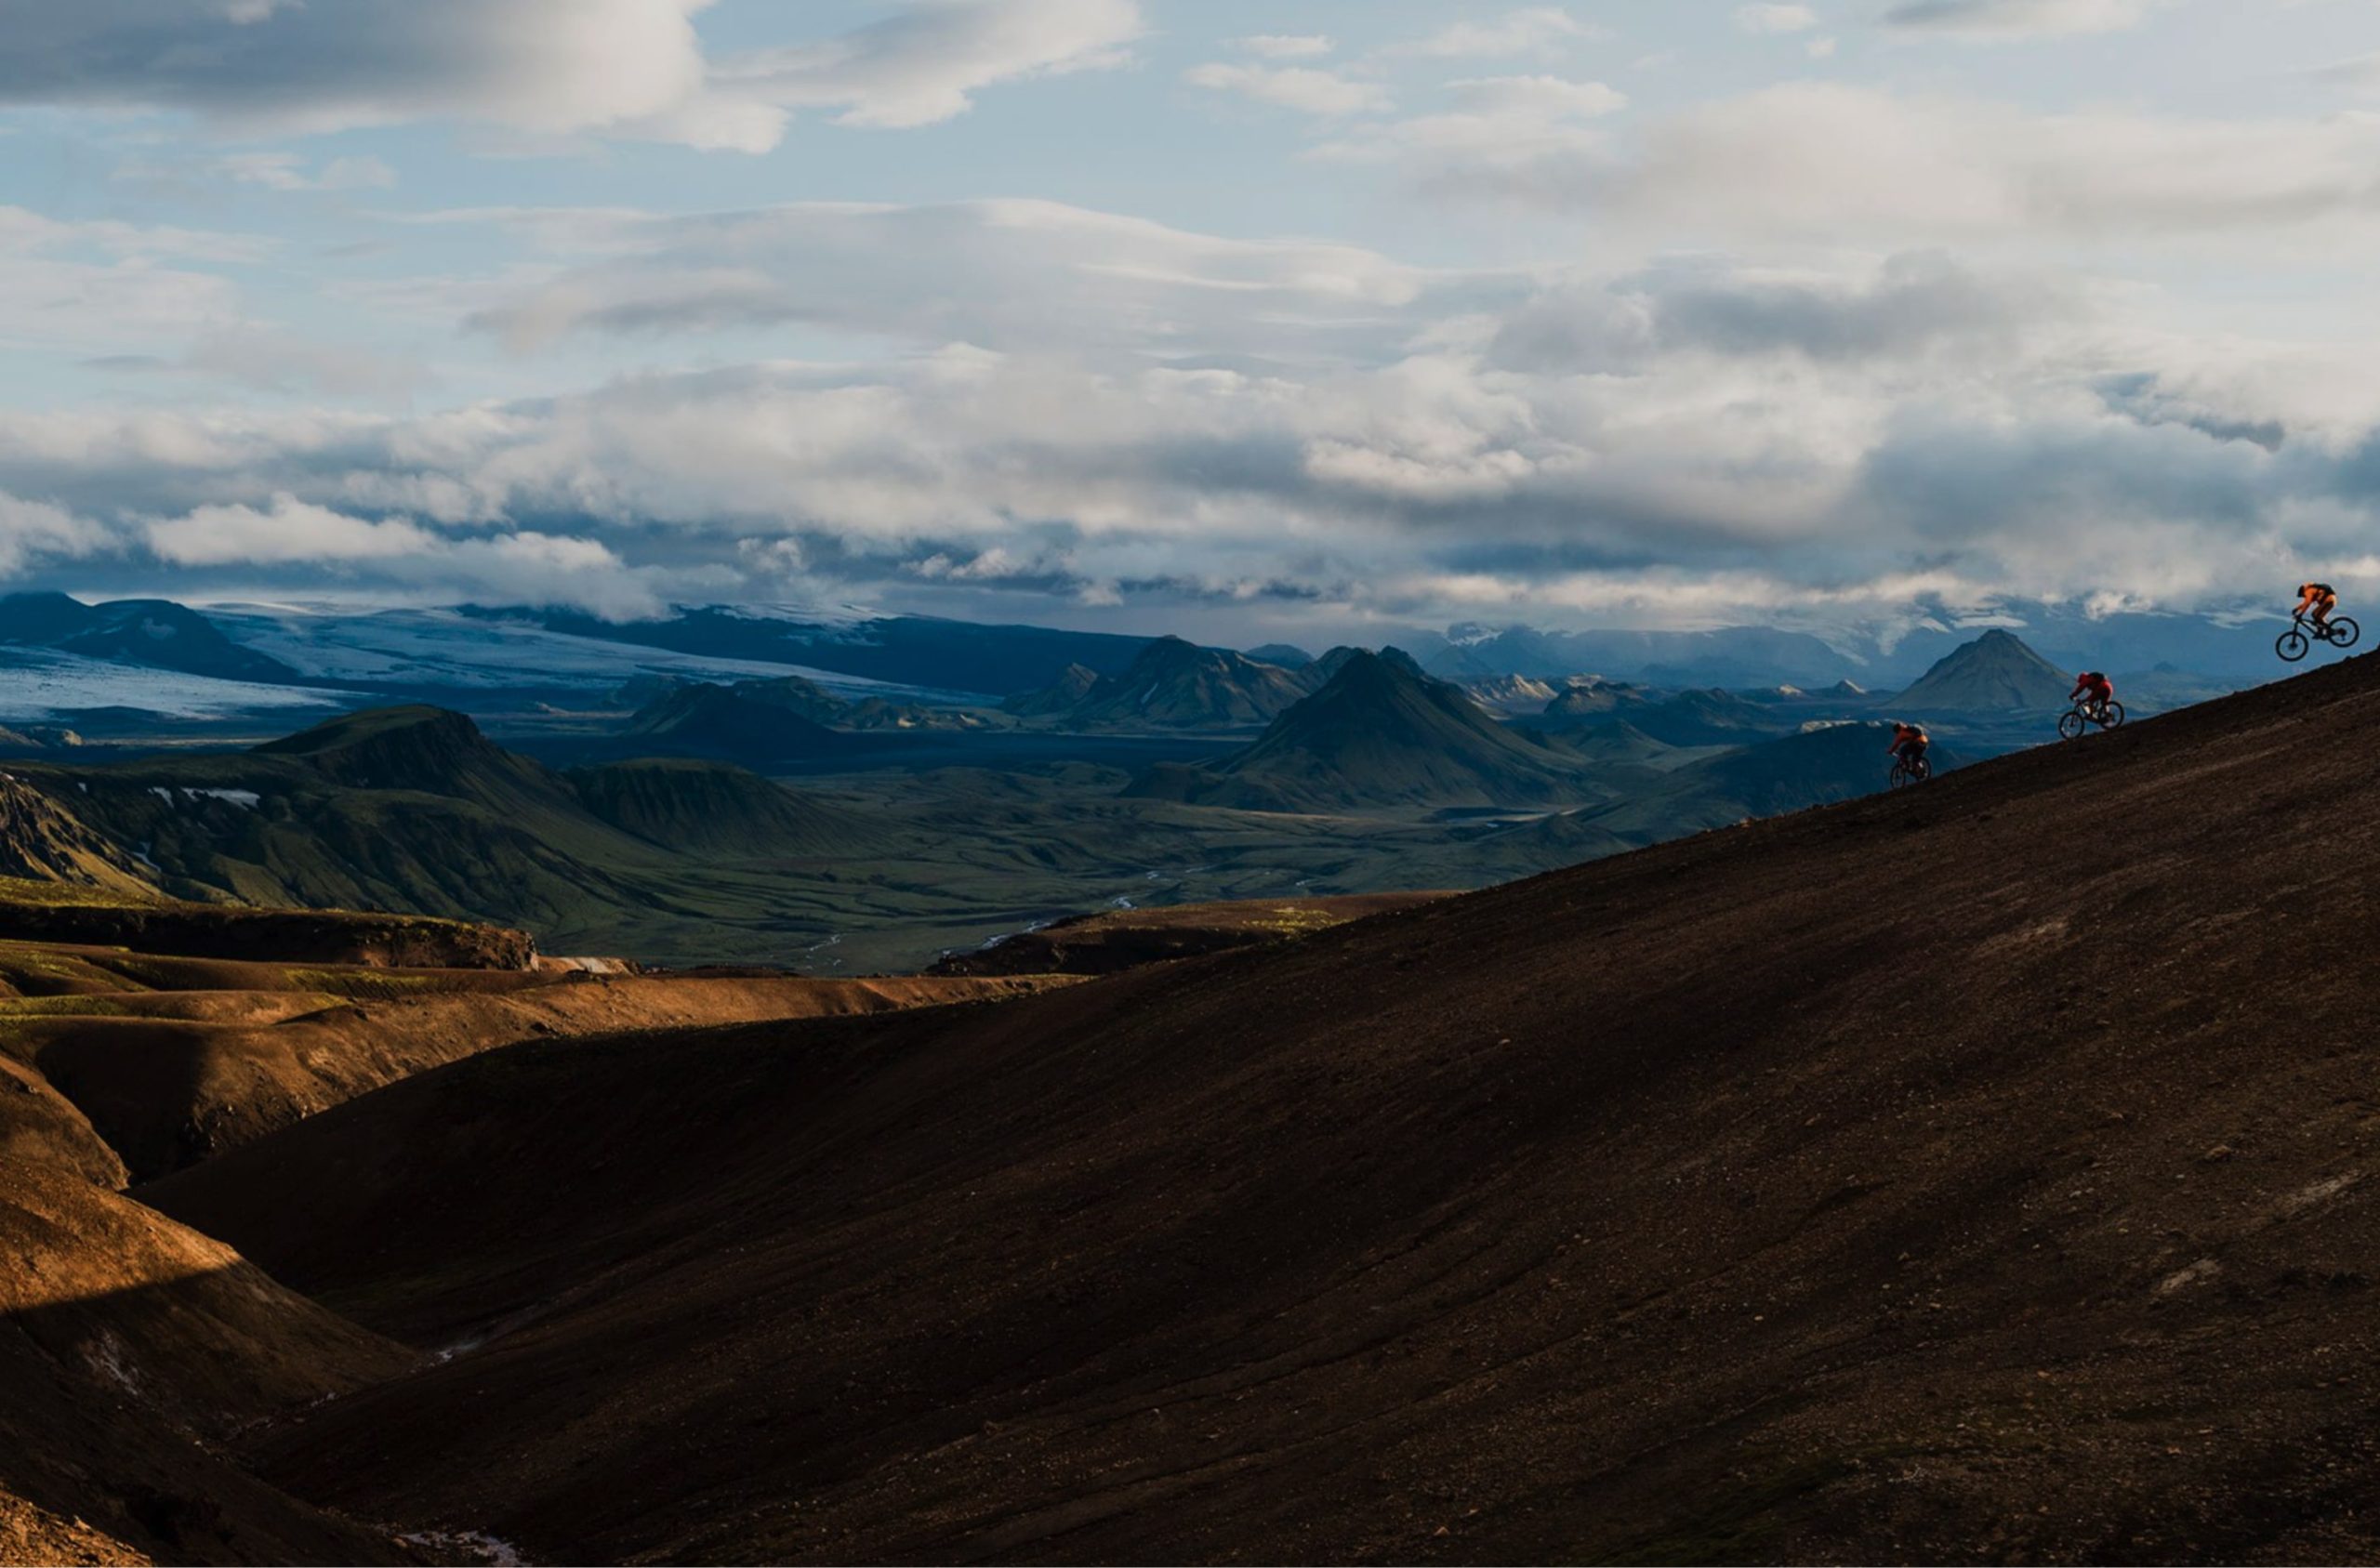
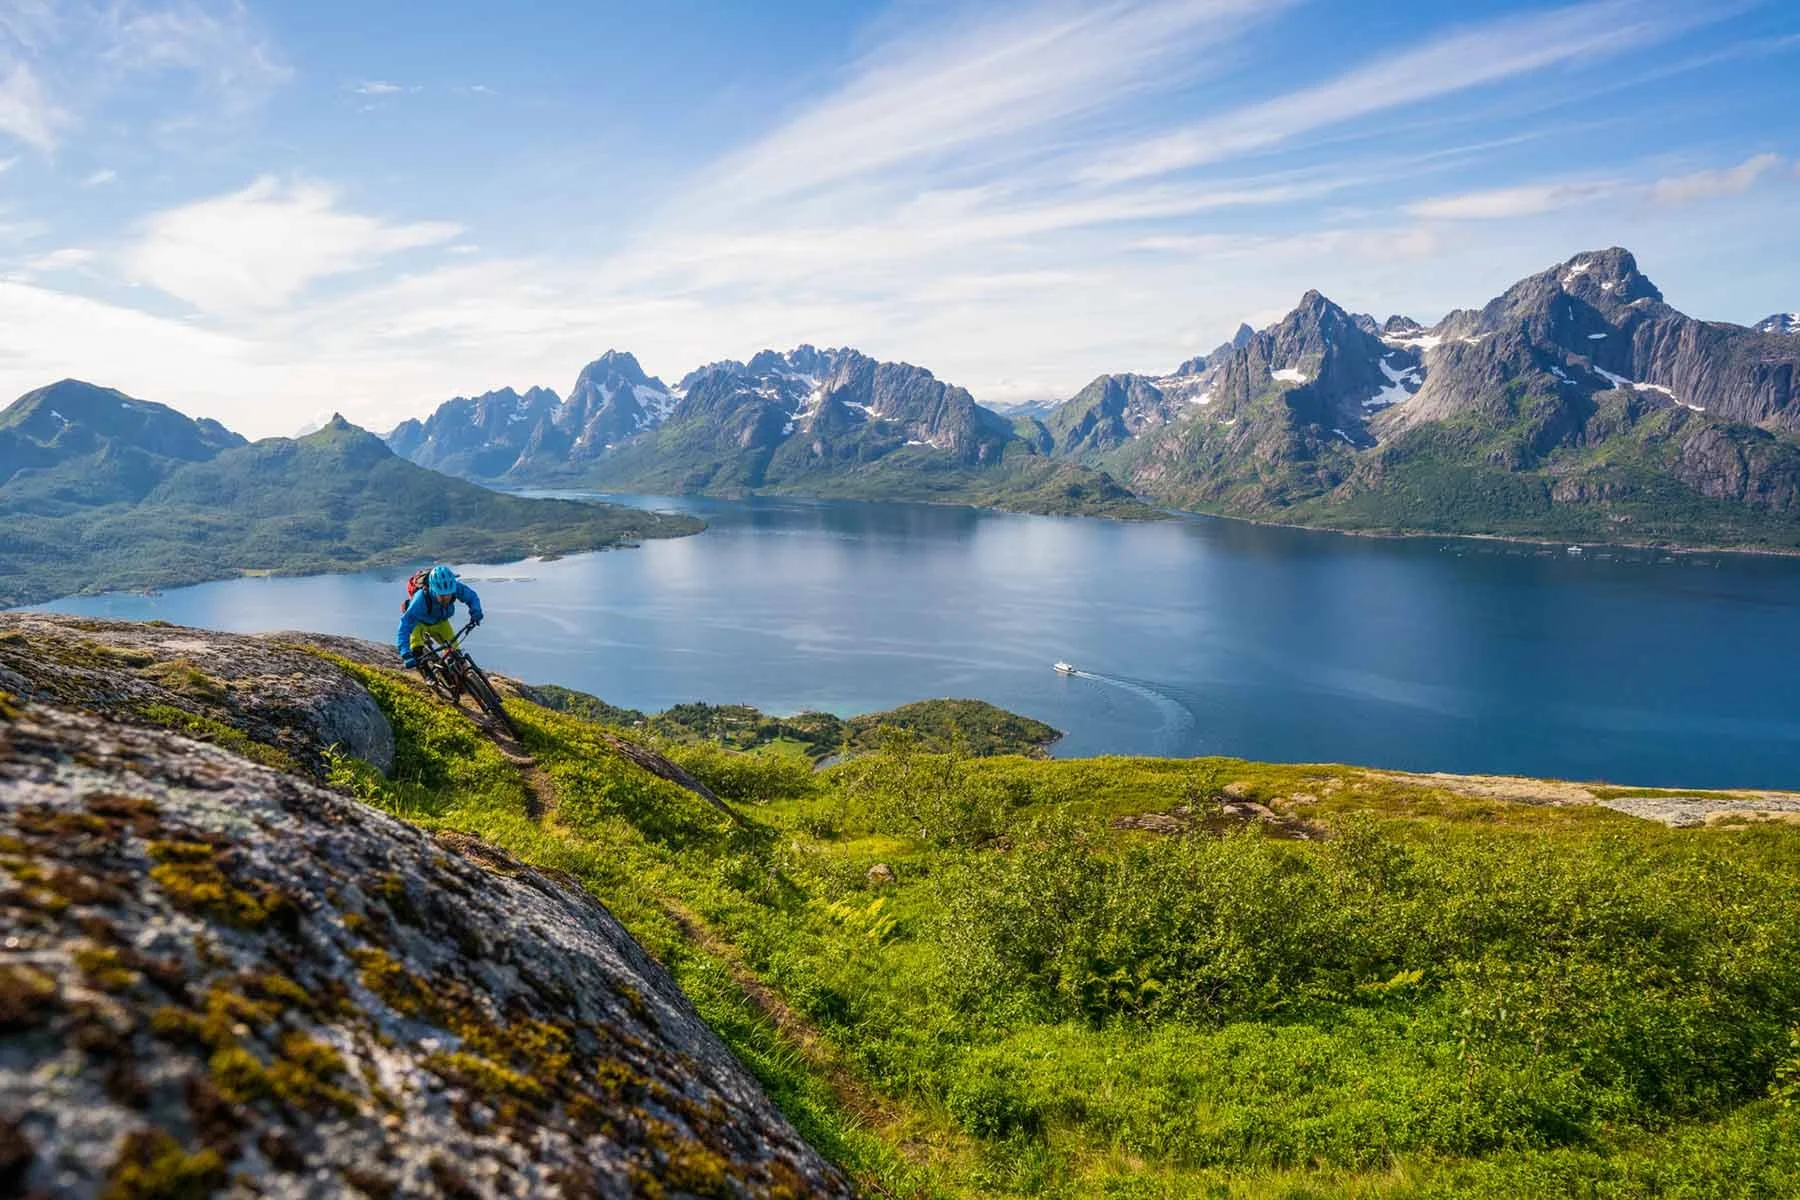
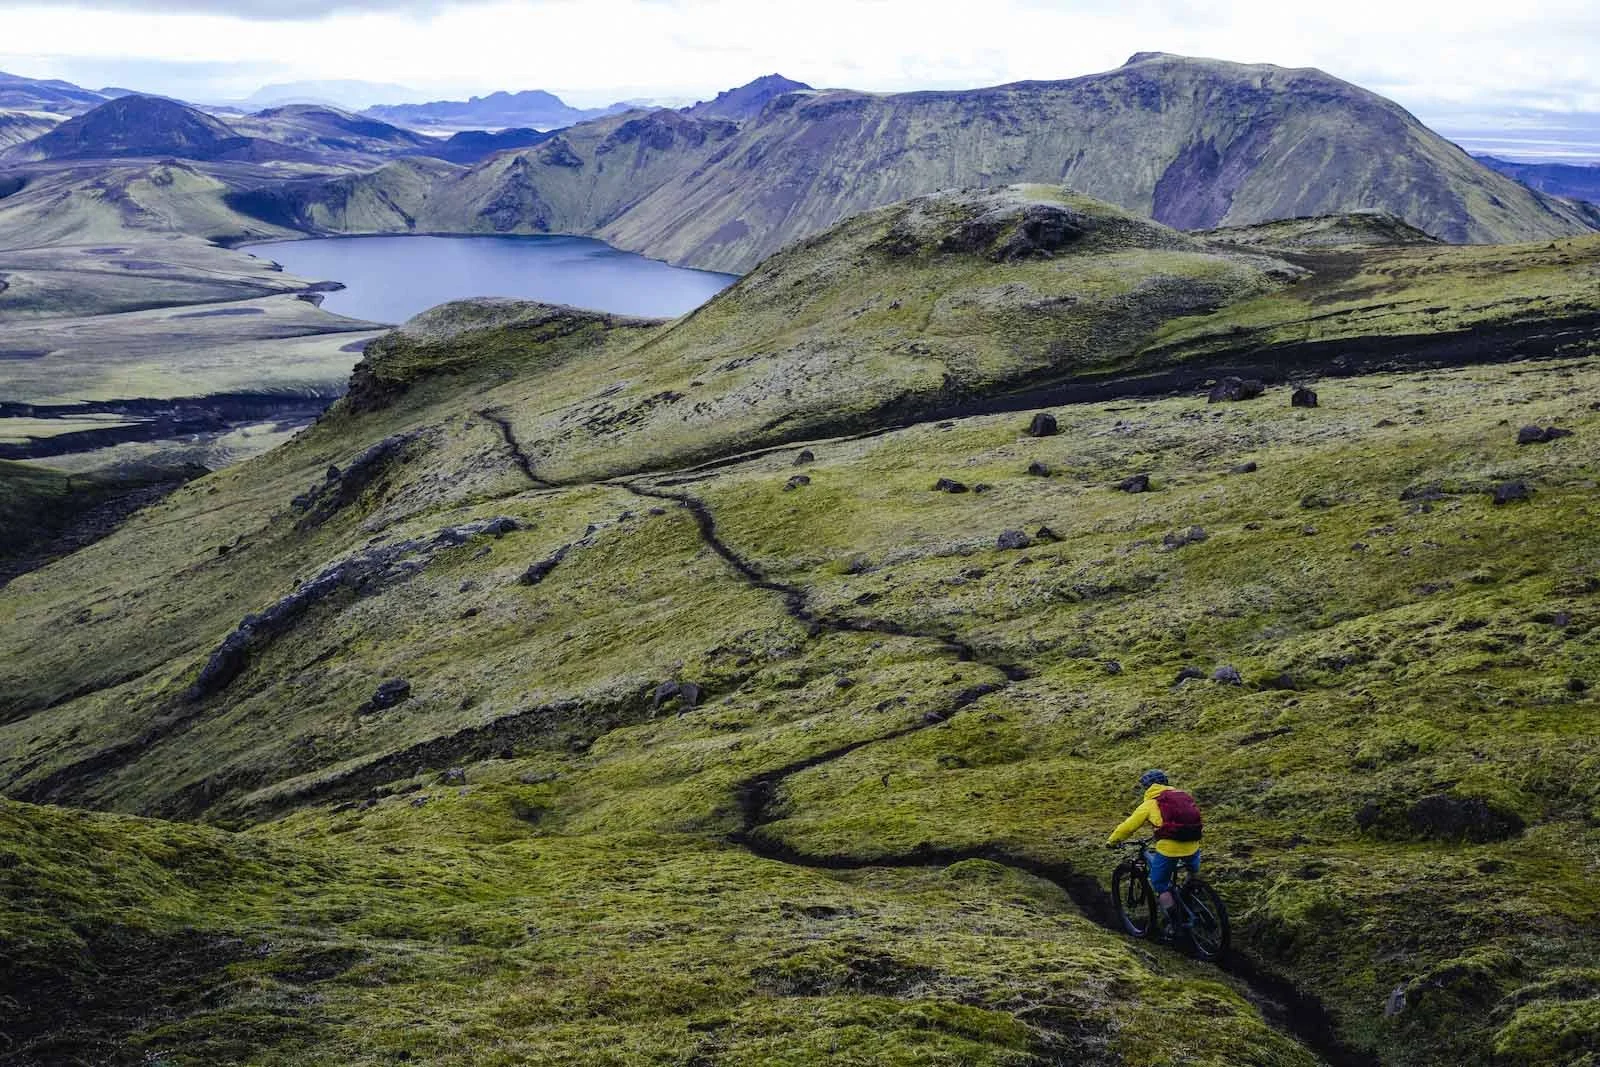
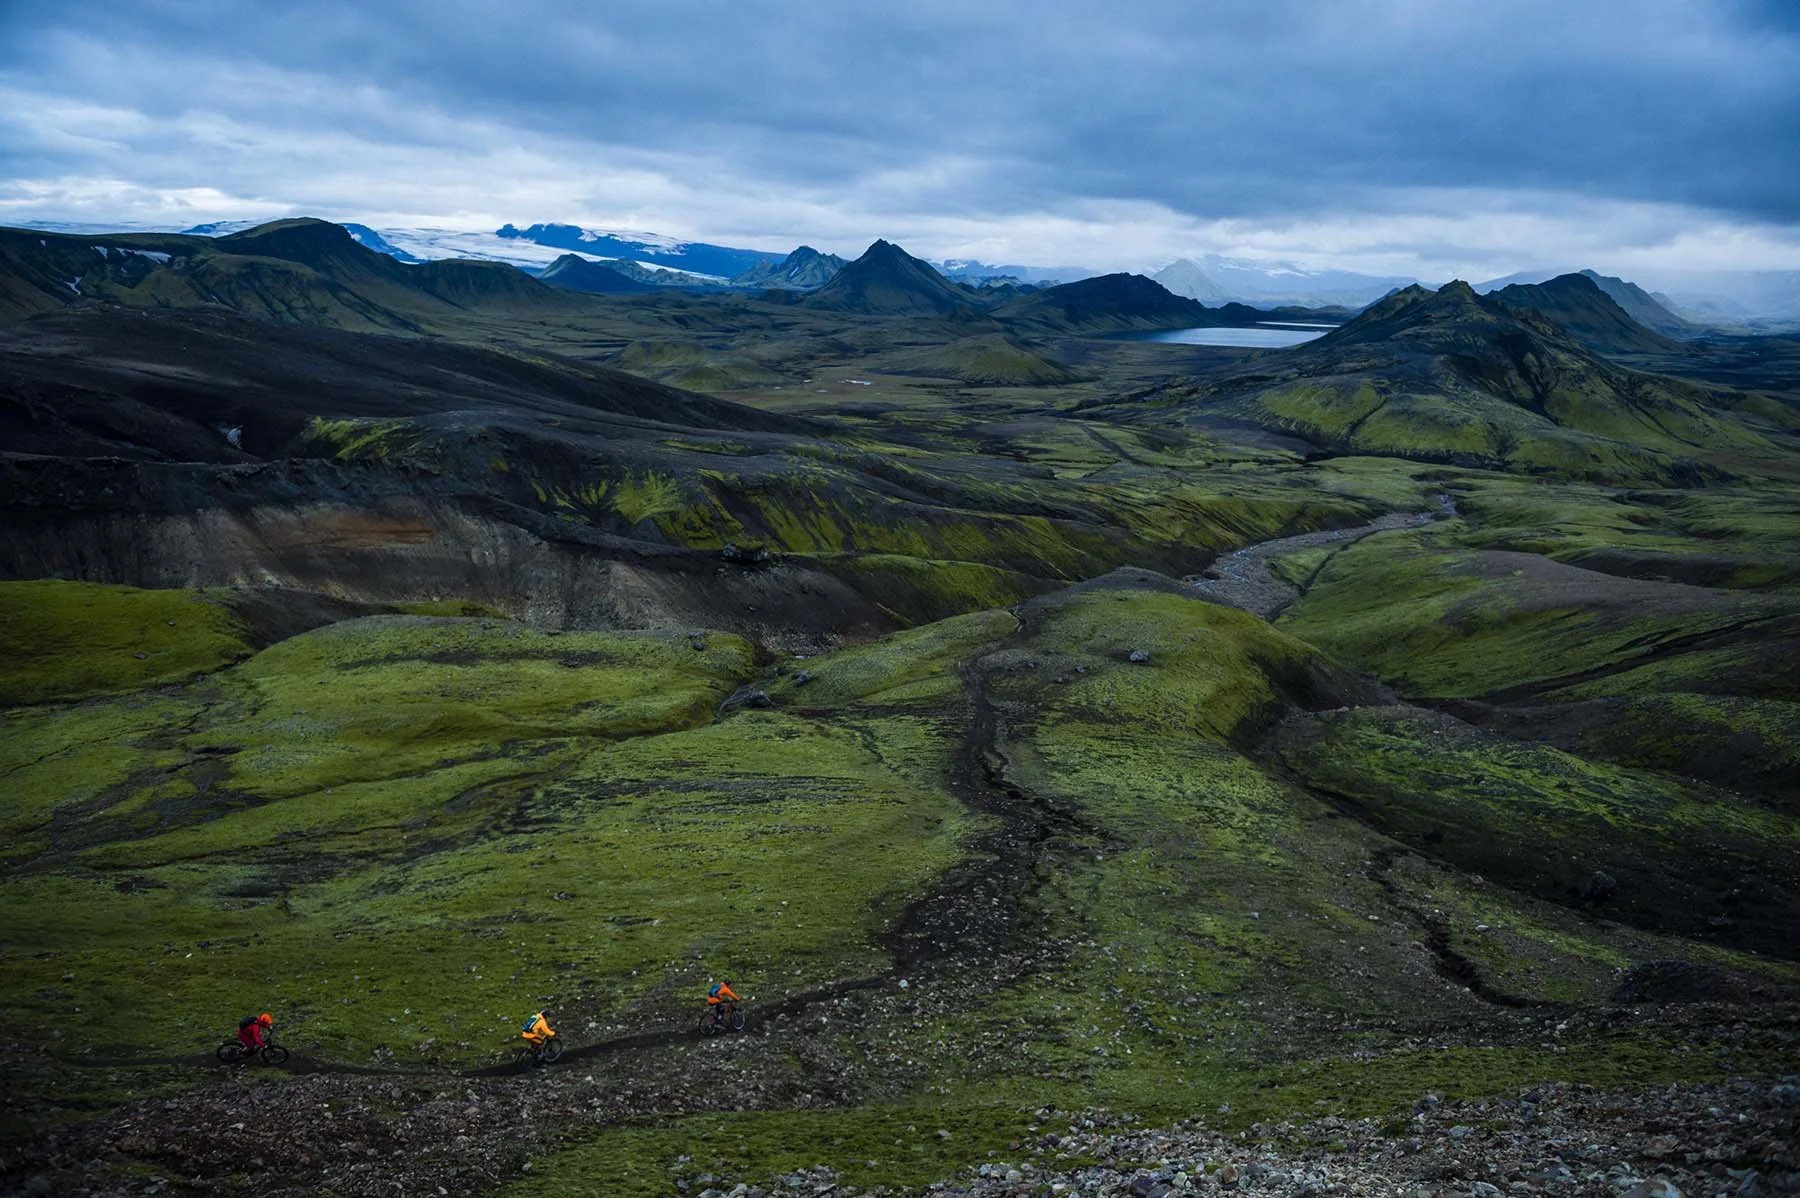
Enhancing Visual Interest with Depth and Scale
Enhancing visual interest with depth and scale involves using compositional techniques to give your mountain bike photos a sense of three-dimensionality and to emphasize the size or scale of the landscape in relation to the rider.
- Incorporate Foreground Elements: Use objects in the foreground to create layers and depth.
- Showcase the Environment: Include expansive backdrops to highlight the scale and challenge of the terrain.
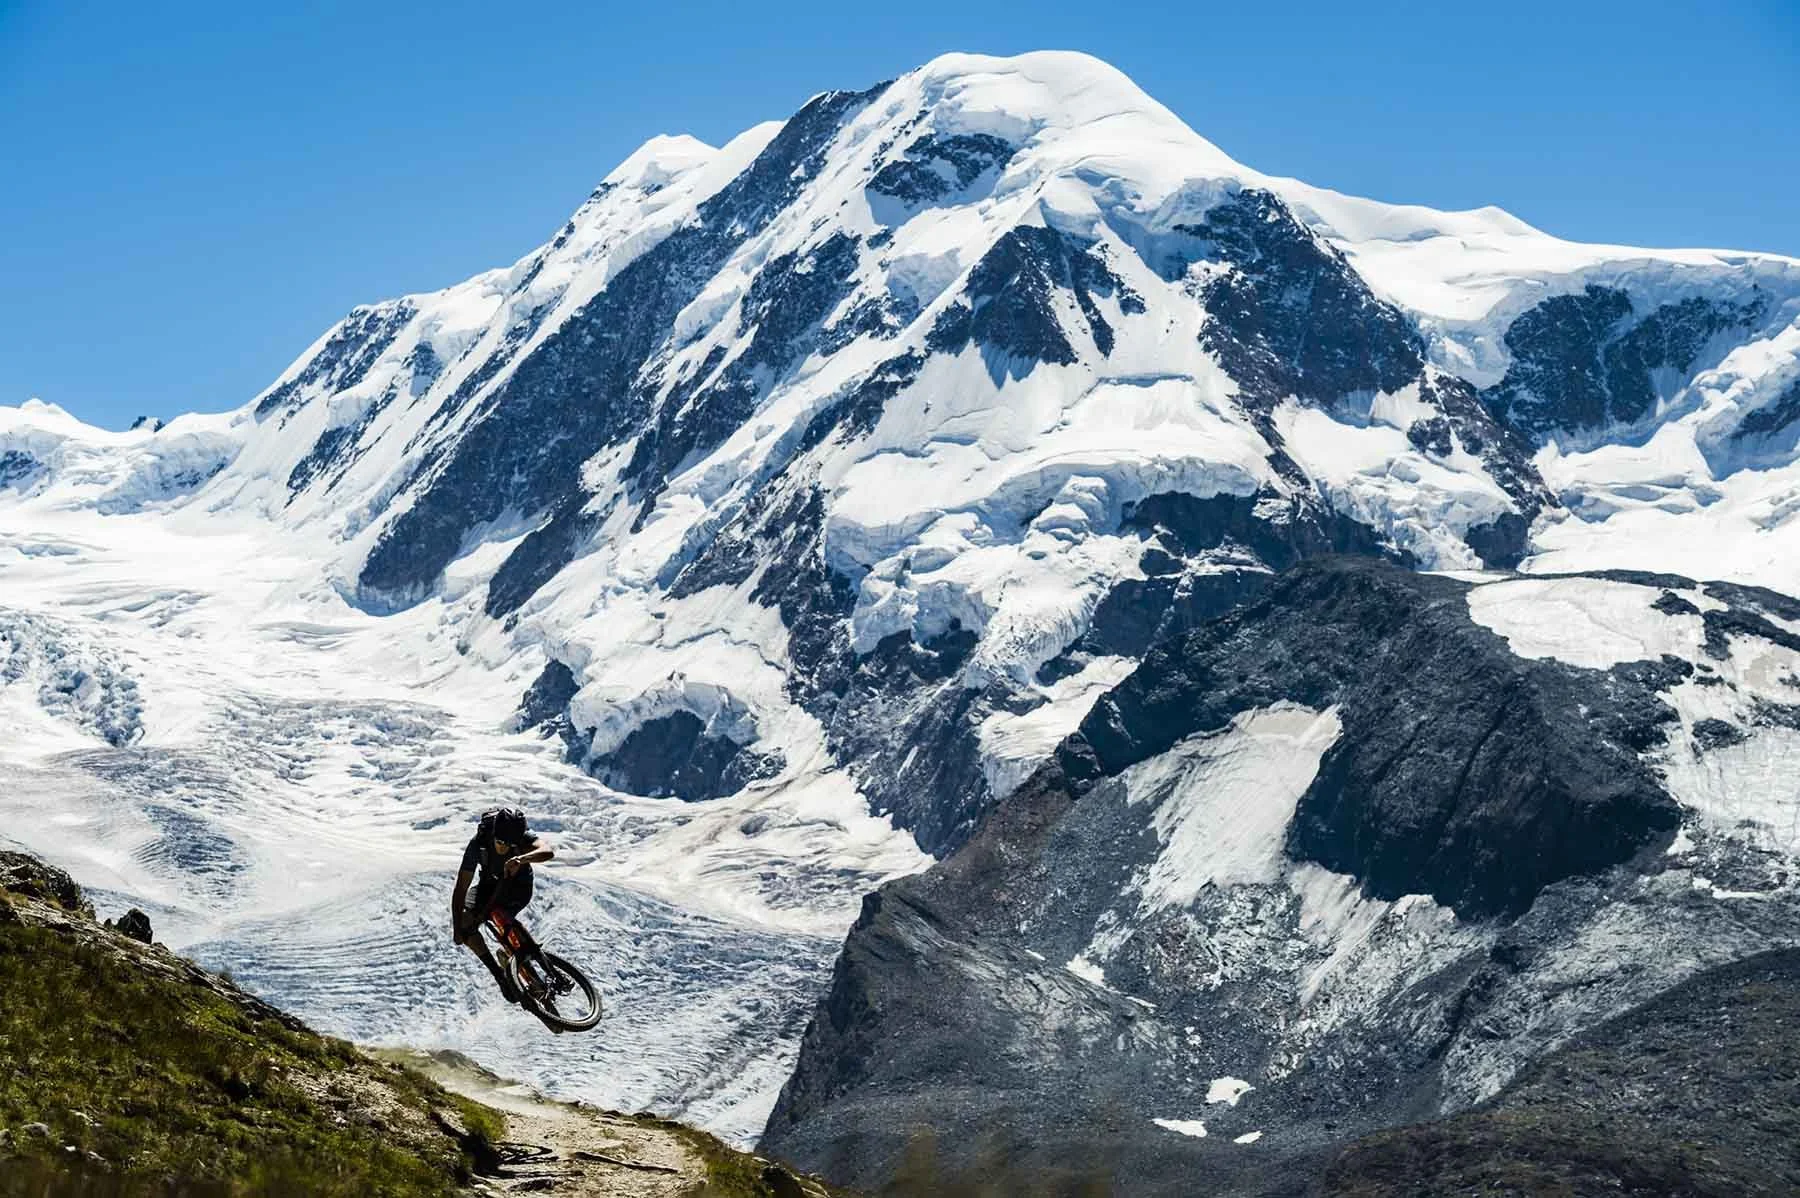
- Play with Perspective: Shooting from low angles can make jumps look higher and riders more imposing, adding drama to the shot.
Vibrant Storytelling with Color and Contrast
Vibrant storytelling with color and contrast is about using the visual elements of color and the play between light and dark to bring your mountain biking photos to life, telling a story that captivates the viewer.
- Seek Out Color: Look for vibrant backgrounds or clothing to make your subject stand out.
- Manage Light: Shoot during times when the contrast between light and shadow is most dramatic, like early morning or late afternoon.
- Edit for Impact: Use photo editing software to enhance colors and contrast, making your images pop and convey the desired mood or atmosphere.
Utilizing Burst Mode for Lively Sequences
Utilizing burst mode for lively sequences means capturing several photos in quick succession to ensure not a single moment of action is missed. This technique is perfect for mountain biking photography where every second counts.
- Enable Burst Mode: Set your camera or smartphone to burst or continuous shooting mode.
- Hold Steady: Keep the camera focused on the action as it unfolds.
- Select the Best: Review the sequence to choose the most dynamic and well-composed shot.
MTB Photography tips For GoPros
Wide-Angle Wonders: Leverage the wide-angle lens to capture expansive landscapes and immersive action shots, getting close to the subject for dramatic effects.
Steady and Go
Use mounts and stabilizers to reduce shake, especially on rough terrains, ensuring smooth and clear footage.
Explore Perspectives
Attach your GoPro to different parts of the bike or helmet for unique viewpoints, capturing the essence of the ride from multiple angles.
MTB Phone Photography
Tap to Focus
Use the tap-to-focus feature on your phone to ensure your subject is sharp, especially in action shots where precise focus matters.
HDR Mode
Activate HDR mode in high contrast scenes to balance the light and shadows, ensuring details are not lost.
Edit on the Go
Utilize mobile editing apps to adjust exposure, contrast, and color post-shoot, enhancing your photos directly on your phone.
Enhancing Your Shots: Post-Production Tips
To enhance your mountain bike photography in post-production, you’ll need software like Adobe Lightroom or Photoshop for detailed editing.
For mobile users, apps such as Snapseed or Lightroom Mobile offer powerful editing tools right on your phone. These tools allow you to adjust exposure, color, and composition, ensuring your shots look their best with just a few taps or clicks, making it accessible for photographers at any skill level and with any device.
Boost the exposure slightly for underexposed shots and adjust the contrast to make your subject stand out against the background.
Apply sharpening filters to bring out the textures and details in the rider’s gear and the natural terrain.
Reframe your shots by cropping to improve composition, remove distractions, or focus more on the action.
Conclusion
In the journey of capturing the essence of mountain biking through photography, we’ve navigated through a series of tips and techniques designed to elevate your mountain biking photography.
From mastering the basics of dynamic composition and lighting to embracing the power of modern technology with GoPros and smartphones, each piece of advice aims to enhance your ability to tell vibrant, compelling stories of your adventures. As you prepare to capture these moments, it’s equally important to be well-prepared for the ride itself. For tips on how to gear up for your journey, take a look at our guide on mountain bike trip preparation. Whether you’re adjusting settings to freeze a moment of high-speed action or exploring creative perspectives to showcase the grandeur of the landscape, remember, the ultimate goal is to capture the soul of mountain biking. Armed with these mtb photography tips and prepared for the trails ahead, you’re now ready to document your own thrilling rides, creating lasting memories and inspiring others to explore the beauty of mountain biking.
MTB Photography FAQs
The ideal setting for mountain bike photography typically involves a fast shutter speed (at least 1/800 sec) to freeze motion, an aperture of f/2.8 to f/8 for a good depth of field, and ISO adjusted based on lighting conditions. This combination captures sharp, detailed action shots.
To take pictures on a mountain bike, position yourself strategically along the trail where action is likely to occur. Use burst mode to capture multiple shots quickly, focus on framing the rider within the landscape, and try different angles for more dynamic images.
DescA versatile lens like a 24-70mm f/2.8 is excellent for mountain bike photography, offering a balance between wide-angle and telephoto capabilities. It allows for capturing expansive landscapes as well as tight, detailed action shots with beautiful bokeh.ription text goes here
Mountain bikers often use action cameras like GoPros for their ruggedness and ease of mounting on bikes or helmets. For higher quality images, DSLRs or mirrorless cameras with fast autofocus and continuous shooting modes are preferred, allowing for greater control over composition and exposure.
Use a slower shutter speed and follow the rider with your camera as they move. A tripod can help stabilize your shots.
Yes, modern smartphones are equipped with advanced cameras capable of capturing high-quality photos. Utilize features like burst mode, HDR, and manual settings to enhance your shots.
Experiment with different modes such as Burst for action shots and Time Lapse for dynamic scenes. Adjusting resolution and frame rate can also help capture the intensity and speed of mountain biking.
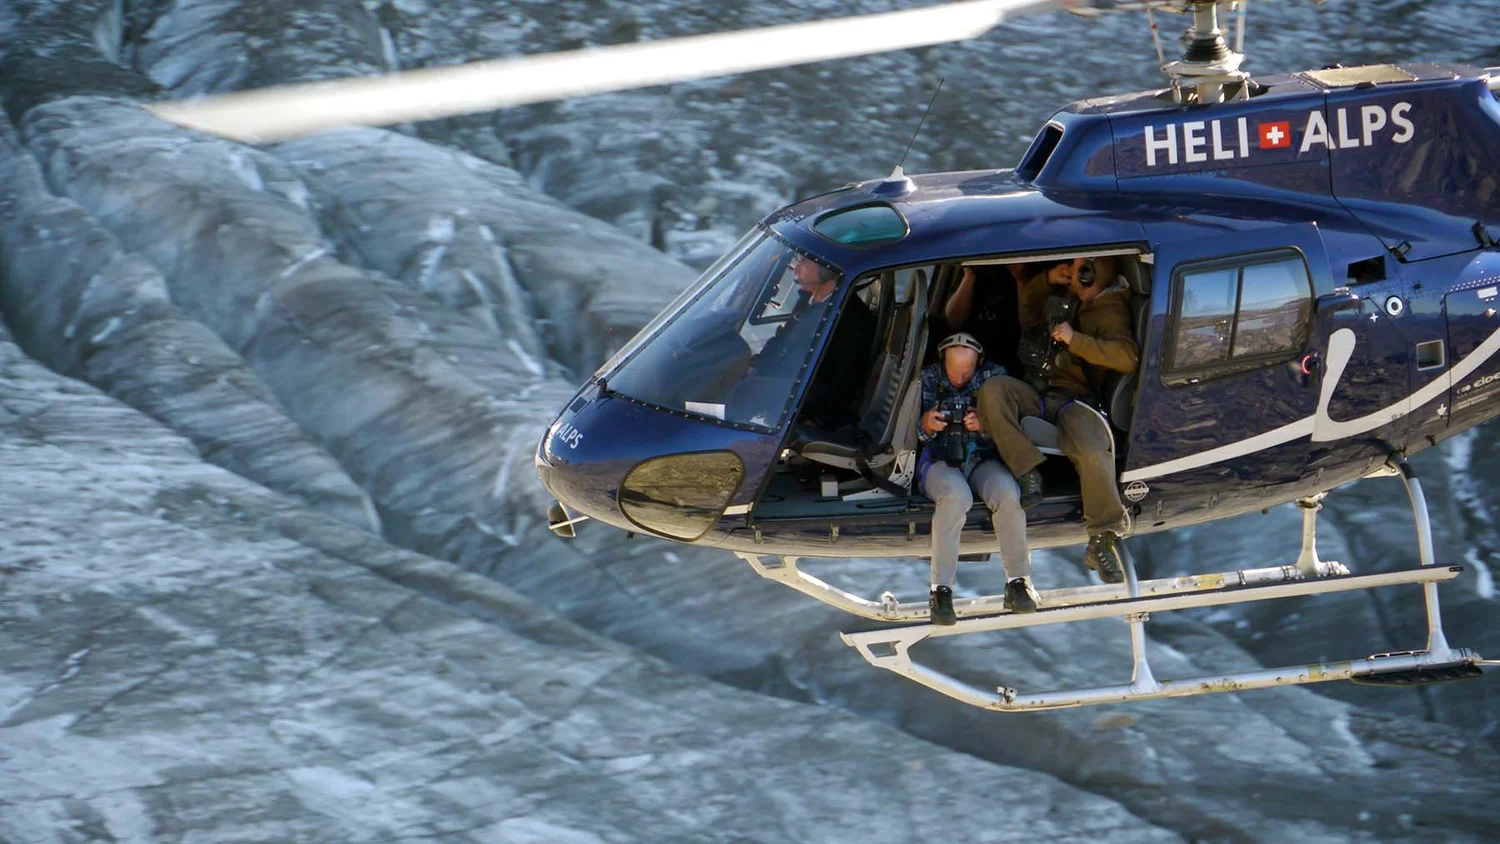
Embark on a journey where every single trail offers a story waiting to be captured. Our mountain bike holidays guide you through the globe’s most photogenic locations, presenting not just a ride, but a visual adventure. Whether you’re a seasoned photographer or simply love snapping shots on your phone, these destinations promise breathtaking backdrops for your mountain biking photography. Capture the essence of your adventure with landscapes that beg to be photographed, turning your mountain bike trip into an unforgettable visual diary. Join us, and let the world be your canvas.